Mold is a persistent and hazardous issue in homes and businesses. However, with the right approach, you can effectively eliminate it and restore a safe and healthy environment. It is crucial to understand the key steps in successful mold remediation, whether it’s a small problem or a more extensive infestation. In this guide, we’ll cover eight essential steps, from assessment to clearance testing, to help you confidently tackle mold remediation.
Prepping for Remediation
1. Assessment
The first step in successful mold remediation is a thorough inspection, moisture survey, and air quality assessment. Professionals will identify the extent of the mold problem and determine the level of contamination. Given the rapid spread of mold spores, they may collect samples from both affected and unaffected areas to ensure a comprehensive diagnosis.
During the assessment, they will locate the moisture source promoting mold growth and develop a tailored remediation plan. This step is crucial for determining the appropriate methods and addressing all affected areas. After the assessment, the expert will give you a report, outline the steps in the remediation process, and provide a quote for removing the mold.
2. Address the Moisture
Mold will persist unless you tackle the underlying issue-moisture.Before the remediation service arrives, it’s crucial to identify and rectify the source of your moisture problem. Moisture provides the ideal conditions for mold growth and will lead to its reappearance even after professional removal. Whether it’s inadequate ventilation, leaking gutters, or plumbing issues, prompt action is necessary to prevent mold from recurring.
Remediation Process
3. Isolating Contaminated Areas
After fixing the moisture problem, the remediation company will seal off the mold-affected area to keep it from spreading. This involves isolating the contaminated areas to prevent the spread of mold spores to other parts of the building.
Mold spores spread quickly in damp conditions, so professionals will close off all windows and openings, covering them with plastic sheeting for extra protection. Technicians will use physical barriers and negative air pressure to contain the mold, ensuring the remediation process is safe and effective. Experts will also spray all the affected rooms to eliminate airborne mold. This helps prevent dust particles with mold spores from spreading.
4. Removing Damaged Items
Moldy items and materials need to be thrown away. All porous items affected by mold, such as carpeting, clothing, plaster, drywall, and fabric-covered furniture, should be removed from the building instead of cleaned. These materials should be tightly sealed in thick, airtight bags, which should be wiped down to remove mold spores. Depending on local regulations, professionals can dispose of these moldy items in a regular landfill.
5. Cleaning the Affected Area
This stage has two steps. First, the professionals spray an EPA-approved biocide on the affected area to kill the mold. This substance makes the mold spores sterile, so they can’t spread. Non-porous items like bathtubs, countertops, metals, tiles, and sinks will be treated. Remediation experts will also use commercial-grade antimicrobial sprays to kill as many mold spores as possible on porous items that cannot be removed, like wooden wall studs.
The next step is cleaning. Professionals will use HEPA-approved vacuums to clean all surfaces, removing any leftover moisture, mold residues, and fragments from the spray. Their filters capture tiny mold spores, significantly improving indoor air quality and preventing further contamination. These vacuums also wipe and dry the surfaces to get them ready for a coat of whitewash or special paint that helps prevent future mold outbreaks.
Depending on the severity of the contamination, different techniques may be employed, such as wet wiping, sanding, and abrasive blasting.
6. Encapsulation
After cleaning the affected area, the remediation experts give the biocide time to work. The waiting time depends on how long the biocide takes to be effective and dry. The surface must be fully dry before application. Active mold left underneath encapsulated areas can quickly grow again. Therefore, it’s important to eliminate all mold spores before whitewashing or painting.
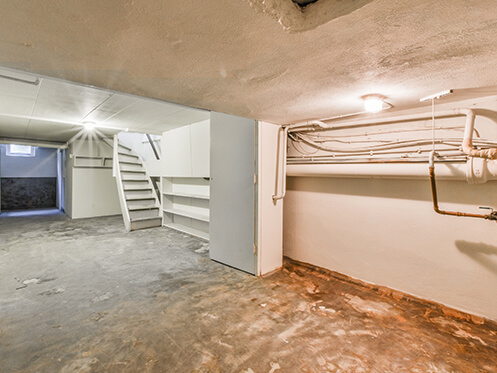
Once dry, the professionals spray the area with whitewash or special paint to cover any remaining mold spores. They spray beyond the affected area to ensure mold doesn’t grow back. For instance, if only a small part of your basement has mold, the remediation company will still spray the entire basement.
Post-Remediation
7. Final Inspection and Testing
After encapsulation, the mold remediation professionals will inspect the area again. They will check moisture levels and humidity and look for any visible signs of mold to ensure the problem is gone. They will also test air samples inside and outside the remediated area.
These steps are essential to confirm if the mold remediation was successful. Mold remediation is usually deemed successful if no mold smell or visible mold remains are present. This final testing also shows whether the area is safe to use and rebuild. The professionals will also give recommendations to prevent future mold growth, such as improving ventilation, fixing leaks, and maintaining proper humidity levels.
8. Restoration and Repairs
Once you get the clearance testing certificate, you can restore the affected areas to their original condition. This may involve repairing or replacing drywall, flooring, insulation, and other materials that were removed during the remediation process. In severe cases of contamination, this might include plumbing and electrical wiring. Proper restoration ensures that your property is mold-free and structurally sound.
Work With Mold Remediation Experts
Mold spores can grow anywhere there’s moisture, leading to health problems and severe damage to your home or business if not removed quickly. Mold removal isn’t a DIY project, so you need an expert to eliminate it and prevent it from returning. It’s a multi-step process that requires expertise and precision.
If you suspect mold in your home or business, contact our mold remediation experts for a thorough inspection. Our professionals have the knowledge, specialized equipment, and experience to find and remove mold. We will restore safety and comfort to your property using advanced, chemical-free mold removal techniques. Whether it’s a minor mold issue or a severe infestation, trust Pur360 to deliver comprehensive and lasting mold remediation solutions.